Soft Sculpture for Toy Faces
- Barbara Prime
- Aug 17, 2020
- 3 min read
Updated: Sep 17, 2020
While stuffing is the most important step in shaping any toy, soft-sculpture will reinforce the shape, and help maintain it if the toy is played with. It also adds a lot of character to your toy's face, allowing you to adjust the direction the eyes are facing, and how prominent the nose and cheeks appear. Below is a photo tutorial showing my technique for sculpting around the eyes. I hope you find it useful!
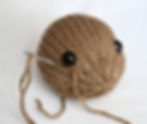
Here is a basic head from the front, with safety eyes attached, then stuffed and sewn closed. If you are using buttons, embroidery, or felt, instead of safety eyes, attach them first before doing any soft sculpture to the head.

Here is the head from the side. You can see that I've added some extra stuffing to the cheeks and nose, so the head is not just a round ball.

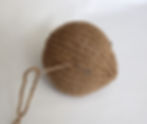
Step 1: To begin, cut a length of your main-colour yarn (about 30 cm or 12"), and thread it onto a sharp needle. (I've used a long, sharp darning needle, which is a good tool to own if you're making several toys.) Insert the needle at the centre-bottom, through the seam (shown with the arrow).

Step 2: Have the needle exit the head near the first eye, towards the nose and in line with the lower edge of the eye. Pull the yarn through, leaving a 7 cm or 3" tail where you began.

Step 3: Insert the needle again below the centre of the eye, making a short stitch (about 1 cm or 3/8"). Have the needle exit at the bottom of the head where you began.

Step 4: Gently pull on the yarn attached to your needle, making sure not to pull through your yarn end. This will make a dent in the head below the eye, and make the cheek seem to stick out more.

Step 5: When you are happy with the shape of the head, tie your yarn in a knot with the short yarn tail. Do not cut the yarn yet, but repeat the previous steps to shape the other side of the head.

Step 6: Once you are happy with the shape of the head, make sure your knots are secure, and trim the yarn ends to about 2.5 cm or 1". These ends will be hidden when you attach the head to the body. Now you can embroider the nose and mouth, and attach the ears.

The method shown above will change the direction that the eyes face, so they seem to be more on the sides of the head. This technique works well for animals like rabbits, beavers, and other animals with longer faces. If you want your toy to have forward facing eyes, like a tiger, a dog, or a monkey, try the slightly different method below.
Follow Steps 1-2 as shown above. When you get to Step 3, insert your needle in front of the eye, as shown in the photo below. Complete Steps 4-6 as described above.

You can see that the eyes point forward now, giving the face a different look. If you want the nose/muzzle more pronounced, you can use the same method to make another stitch between the eyes. I did this on my Big Teddy.

I use this technique on most of my toys. It's simple and quick, and can make a big difference in the appearance of any toys you knit. The sample used in the photos is the head from the Well-Dressed Bunny, but you can adapt it for any of my patterns.
